Niftory x Dapper Wallet

Before you start - explore the basic Niftory X Dapper Wallet experience below. To try out a purchase, use any of these testnet credit cards
Throughout our private beta, we've gotten quite a few people asking about how to use Niftory with Dapper Wallet. We're working on bringing this to everyone, but in the mean time, if you're one of the customers we're supporting with Dapper Wallet on Niftory, this is how you can make it happen.
Dapper Wallet Pre-Requisites
Access to Dapper Wallet Staging: You'll need to be able to login to the Dapper Wallet Developer Portal
Create a Project for your company on Dapper Wallet
Niftory Pre-Requisites
Get a Niftory API Key and Account from Niftory.com
Make sure your Smart Contract is deployed. Follow the steps here.
Once you've done this, you're all set to follow this guide and create your first Dapper Wallet compatible app.
Building with Dapper Wallet and Niftory
Clone the Niftory Sample Repo
The first step to start is clone a new sample - the Niftory Dapper Wallet Sample.
We're going to be focusing on the Dapper Wallet sample. To get the sample running locally, follow the readme instructions (you'll only need node and yarn). You'll primarily need to create a copy of the .env.example (renamed to .env) and update it with your Client ID, API Key, and Secret from the Admin App. You can find more information on this here.
Setting Up Your Dapper Developer Account
Go to the Account Page of the application and sign in with Dapper Wallet. The first two steps should work just fine. Finally, the app will ask you to Configure Your Wallet, where you should see an authorization error from Dapper Wallet:
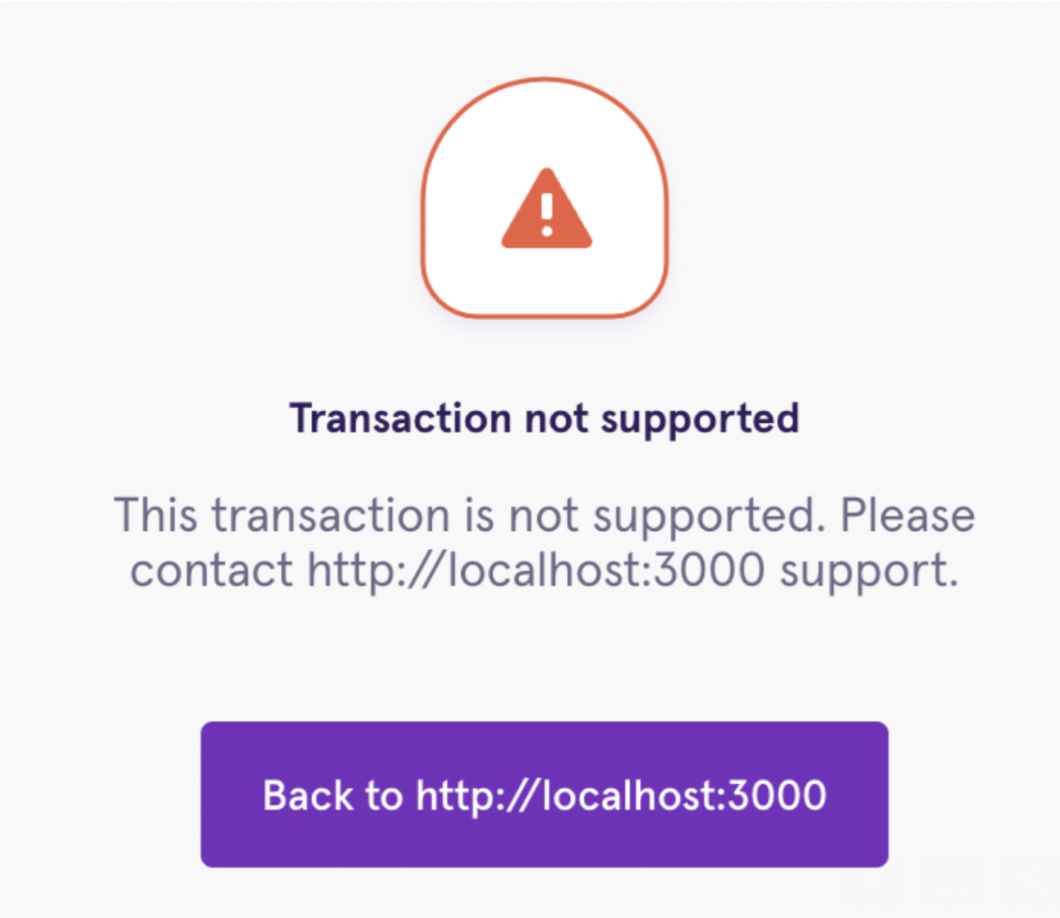
This happens because you need to approve your approve your account setup transaction with Dapper Wallet in the Staging Portal.
Approving your first Dapper Wallet Transaction
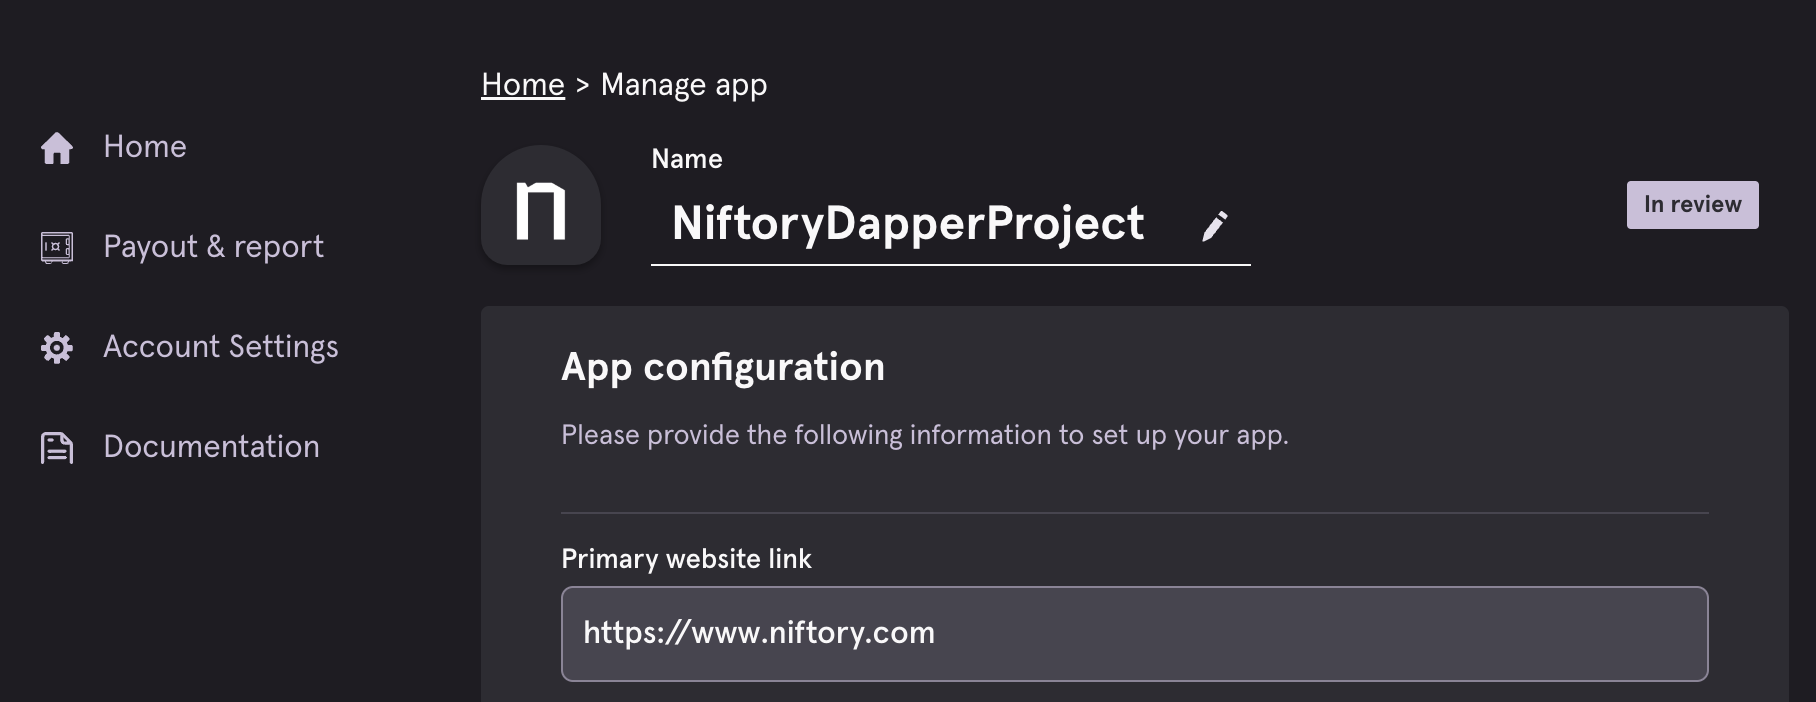
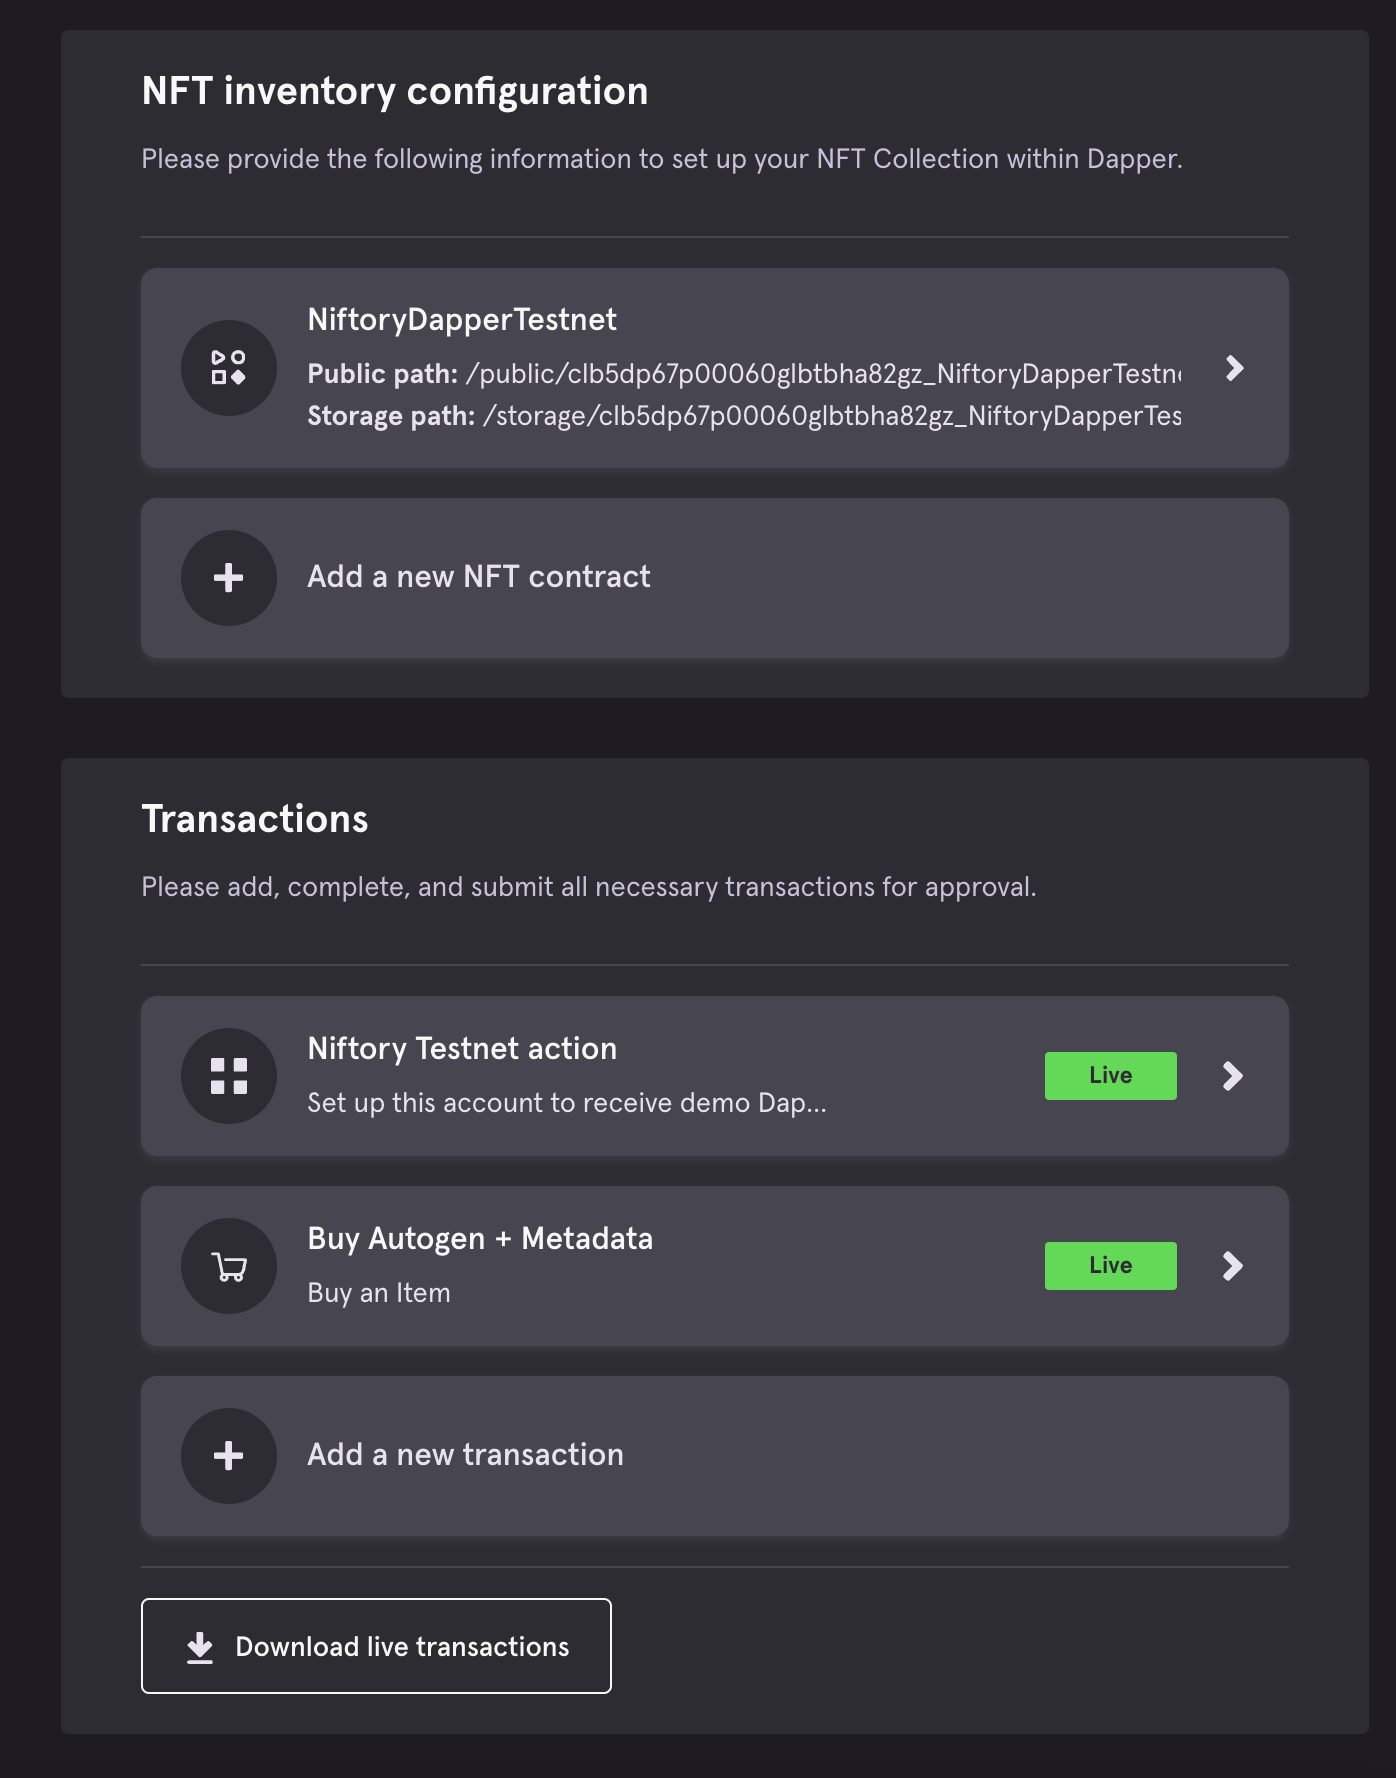
Go to the Dapper Wallet Developer Staging application and into your project and add your contract and your transactions, which allow users to setup their wallets to receive your NFTs and purchase NFTs.
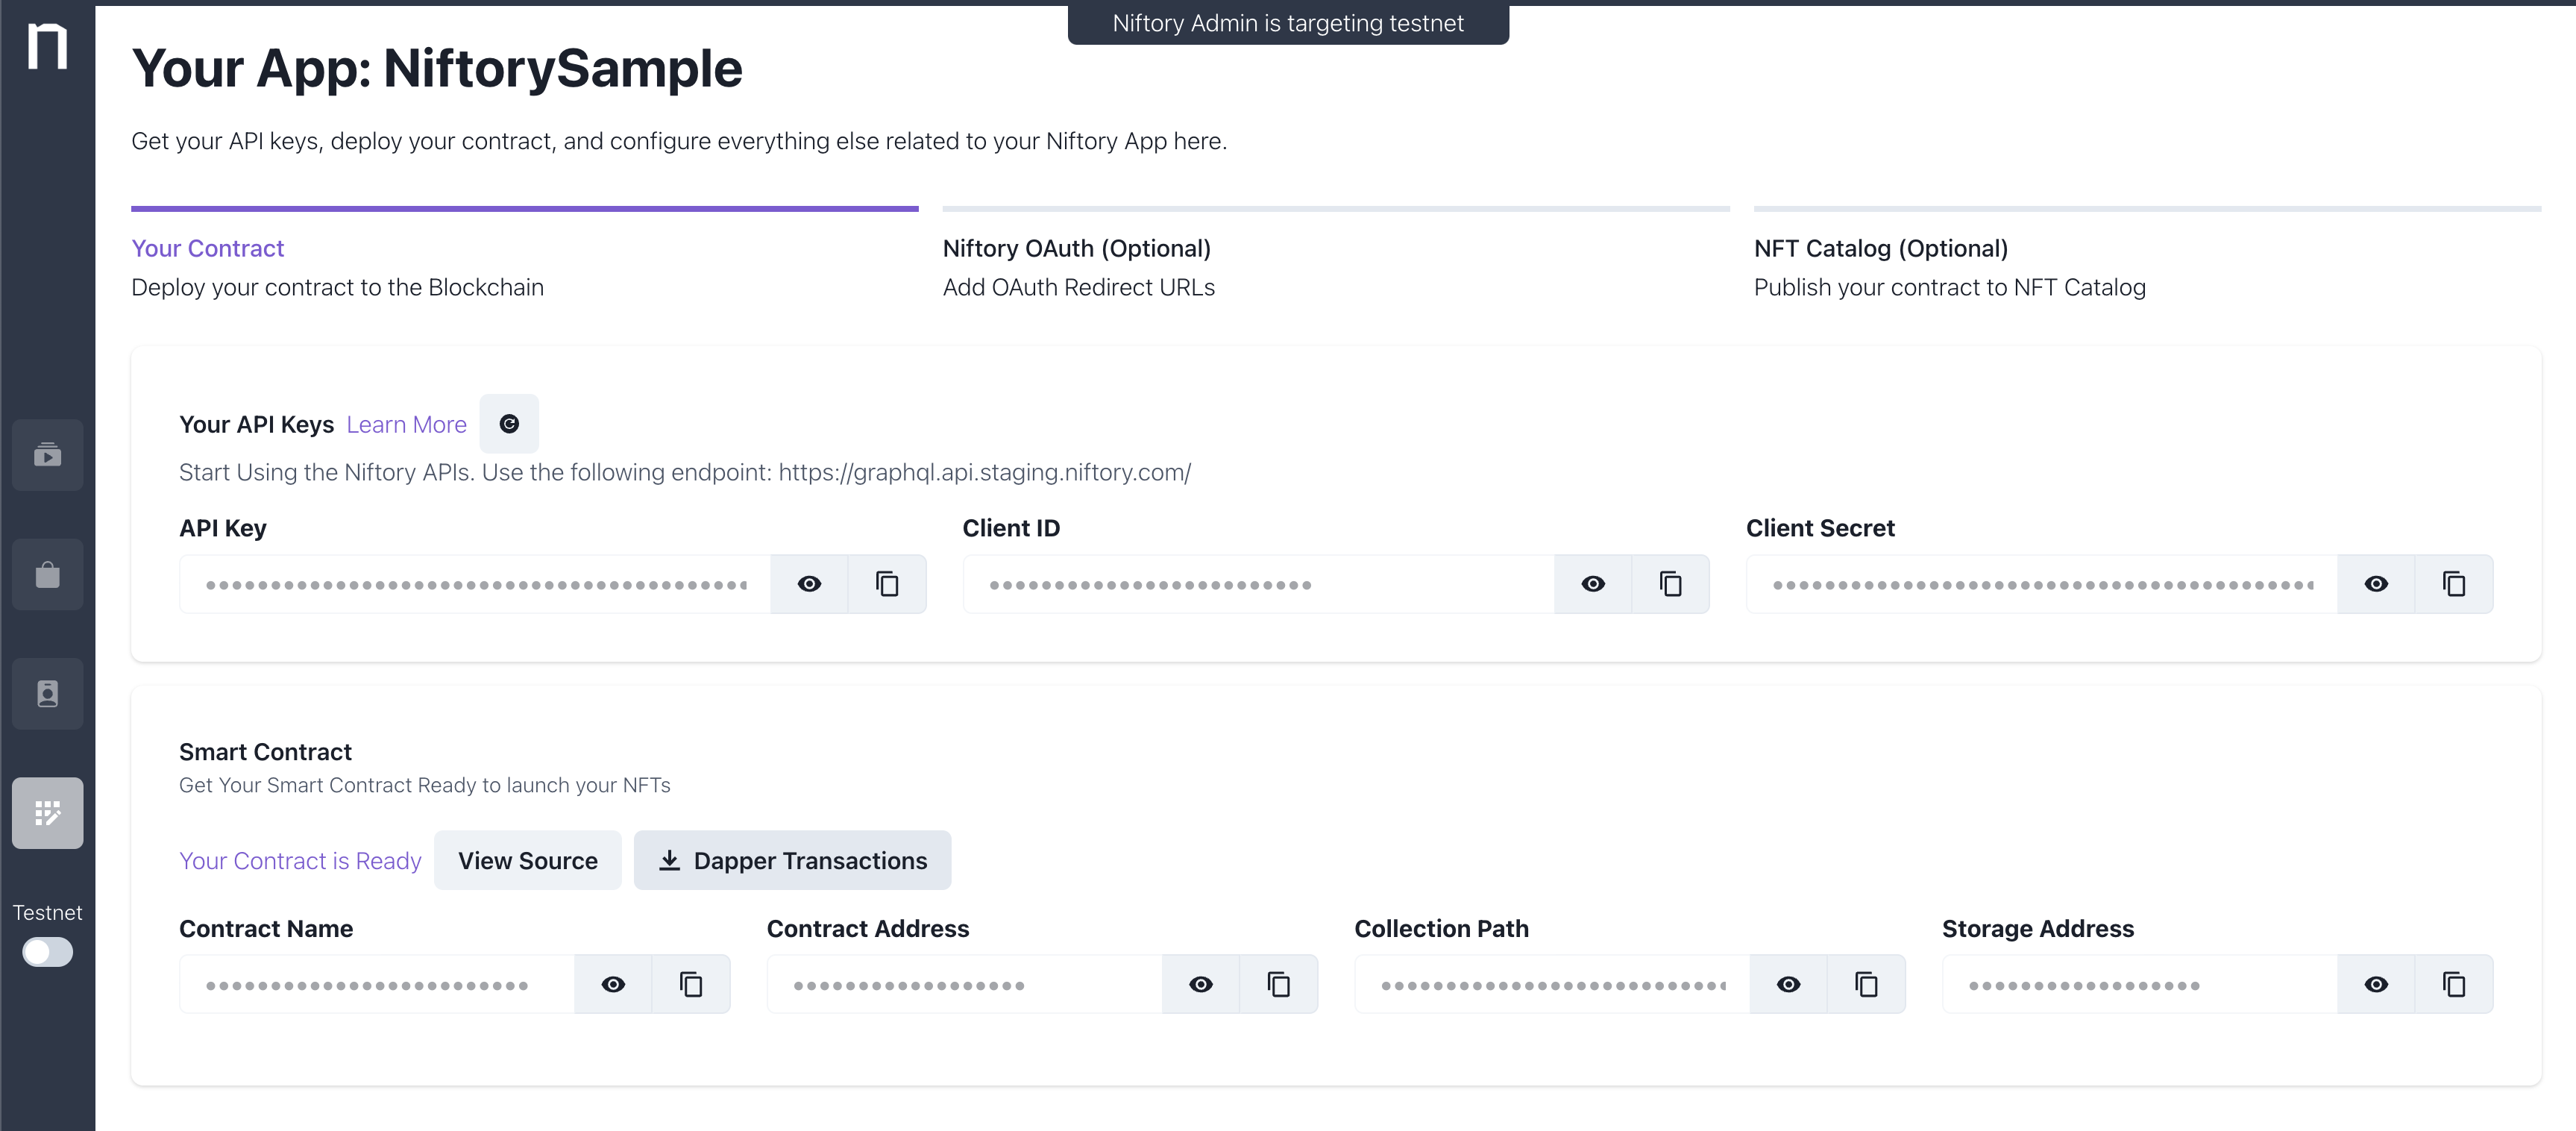
Go to Your App in the Niftory Admin and download the transactions from the Smart Contract section of the page. More details are found at the end of this blogpost. This zip contains three cadence transactions ("setup.cdc", "purchase.cdc", and "metadata.cdc").
Add a New Contract: Add two paths (public and storage). They should look like:
/public/YOUR_COLLECTION_PATH)_nft_collection
/storage/YOUR_COLLECTION_PATH_nft_collection
Example: /storage/clb5dp67p00060glbtbha82gz_NiftoryDapperTestnet_nft_collection
Add Initialize Account Transaction: Click on Add a Transaction and add the "setup.cdc" transaction (with your preferred name and description) as a Custom transaction.
Add Your Purchase Transaction: Upload the "purchase.cdc" transaction to make purchases available as a Purchase transaction. You'll need to paste in the script from "metadata.cdc" into the metadata section.
Creating your first NFTs
After submitting the transaction, you can now complete the wallet setup. You can start creating NFTs in the Admin Portal and Redeeming them through this Storefront.
To start trying, create your first NFT and you should see it show up in your storefront to claim with your Dapper Wallet. For Dapper Wallet NFTs, you'll need to mint the collectible before the first NFT is claimed or purchased.
Add those into the Dapper portal, and you should be all set to start doing purchases with Dapper Wallet! To try out a purchase, use any of these testnet credit cards
Any questions?
Ping us in Discord: https://discord.gg/nZJYz3aJsk
FAQ
** More Details on Getting Contract Info From Niftory **
Go to Your App and you should see everything under "Smart Contract" to copy/paste and a Dapper transactions download button to get any transactions.